Thursday

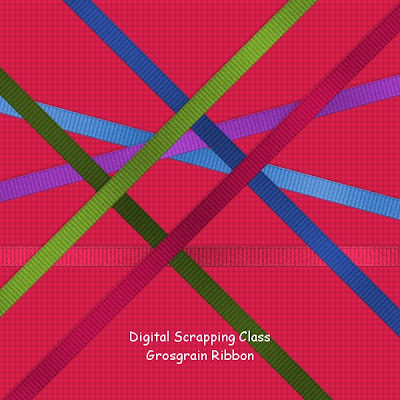
Easy Grosgrain Ribbon

Tutorial - Easy Grosgrain Ribbon
(by PCArt)

Preview Shown at approximately 20% - Click on image to see larger preview.

You may need to adjust the various settings depending on the size of your ribbon - please note tutorials are merely a guide for you to work with - ultimately the end result reflects your own creativity and individuality and style. Try different noise and blinds settings. Also when creating for a scrap page that you intend printing and creating at the large sizes stipulated, Try viewing at approximately 17% to 20 % to see what the printed image size will be like.

1 - Open a new canvas 17 inches x .50 inches (or however wide or long you want your ribbon to be)
17 inches is so that the ribbon can be used corner to corner at 45 degrees across a 12 inch x 12 inch page.
2 - flood fill your canvas with your colour
3 - selections /select all /modify /contract x 12 pixels / invert selection
4 - add a new layer and flood fill selection with a darker shade of your colour
5 - effects / texture effects / blinds / width 30 opacity 50 colour #202020 / horizontal and light Unchecked
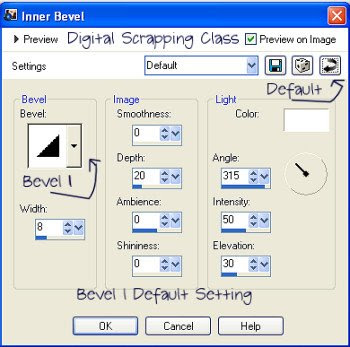
6 - effects / 3d effects / inner bevel / default round - change depth and width to 2
7 - adjust / add remove noise / add noise gaussian monochrome 10 - 15
8 - lower opacity of this edge layer to 50 percent
9 - apply the same blinds and noise effects to the bottom ribbon layer
10 - merge visible
11 - effects / Greg's pool shadow / intensity 52 and lightness 190
12 - use your selection tool to select the end parts of the ribbon "frame" and delete so that your ribbon has raw ends.
13 - selections / select all / float / defloat / crop to selection

File / save as / image name .PNG
Greg's Pool Shadow Zip


Wednesday

Creating stitches in Paintshop Pro

Tutorial - Creating Stitches in Paint Shop Pro
This is an advanced Tutorial (from Just Mommies)


Here I used the script to stitch around preset shapes "square, heart and flower
1 - in vector mode - draw your shape,
2 - choose your tube/stitch/bead
3 - and then run the script!

To get the script for stitching (or beading etc.,)
around your vectors, go here

If you require help contact me, email is in side bar.

Monday

Simple Bezier Flowers

Tutorial - Simple Bezier Flowers(by SuzShook)  Tutorial link no longer available - see my notes below.

Tutorial Note by pat/PCArt
I made the first big pink flower following the tutorial - (well...sort of)
then duplicated and colorized for the red and orange
then played with preset shapes for the little pink ones and fern leaves. Use preset shapes and then use the WARP tool to manipulate the shapes slightly as you prefer. Paint or spray paint selected areas with gradients

Thursday

Dymo Tape Label


Tutorial Dymo Tape Label
by PCArt


Shown at 20%

File New
3600 x 142 pixels 300 pixels per inch Raster background
this is for the tape

Flood fill with colour of choice
Open Font ARLRDBD

Click on Text tool and choose your font
you will see it as Arial Rounded MT 1 from your dropdown menu
and type your words - Auto Kern Off - Kerning 149
Colour white size 100 as Vector
Object - Align - Center in Canvas
Go to your layers and convert to Raster

SAVE

on your text layer
Selections select all float defloat
selections modify expand x 8 ok
add new layer
fill selections on new layer with tape colour
Select None
Effects 3d effects inner bevel
Default bevel 1


Adjust blur Gaussian blur 1
Lower opacity of this layer to 50%

on your top white text layer
(if not at the top - move to the top)

effects 3d effects
bevel default bevel 1
change width to 15 and depth to 5

merge visible
cut tape

apply inner bevel
default bevel 1
change width to 2 and depth to 1

save - you are done

xoxoxo pat/PCArt

Looking for Freebies? Click on the Freebie Label to see what is available!

Digital Scrapping Class

Tuesday

Polaroid Frame


Tutorial - Polaroid Frame(by ©PCArt)
Using Paint Shop Pro


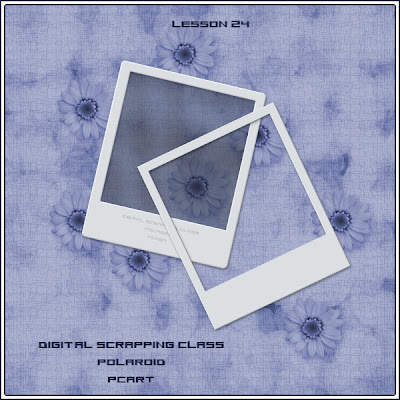
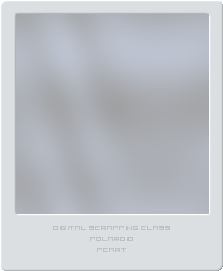
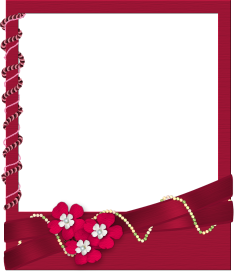
Click on image to see Frames Shown at approximately 20%

Keep in mind the kind of dimensions a typical Polaroid Frame has
and this has to be one of the easiest things to do!

File New Image
1125 x 1353
300 pixels per inch
(Resize this to 20% if you only want to make a tag)

First Layer Create frame using selection tool rectangle
and flood fill Frame #dbdfe2
Use selection tool again to cut out the middle
(see sample images as a guide to where to cut out)
Bevel default 2
change to width 3 depth 3

(Optional Inner Film)
Select with magic wand inside frame
expand selection by 8
Add New Raster Layer
Fill selection on this new layer #202632
Gregs Pool Shadow and reduce layer opacity to about 40%
Make sure inner film layer is underneath

FINISH
Merge visible layers
click magic wand outside frame
invert and crop to selection
and save as .png


Challenge - Decorate those frames!


Now why stop at a plain old empty frame?

You've learned some pretty interesting things - you've made a colour palette, you've made a mat frame, a polaroid frame, a few embellishments, like the charm, a few felt shapes, and perhaps even some papers - now it is time to jazz up your work and make it uniquely you!

Go back to your simplest frames and decorate them and re-save them as a new creation.
Go back to your paper and select a piece of it and make a matching frame for your paper.
Bevel your frames and add other textures to them.
Make frames in different shapes!
Add your bows, buttons, beads etc to them!
Try using the colourizing feature in Paint Shop Pro to change the colours of your pieces

E x p e r i m e n t !
I n s p i r e !
C r e a t e !

Let's see what you can create!
Then show us what you have made - this way we can inspire each other
to try new ideas.

Visit other blogs and see what they make
and then "steal with your eyes" and make something of your own.

Monday

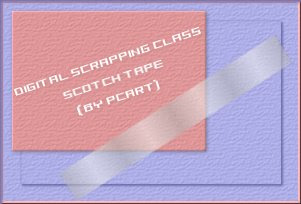
Scotch Tape

Tutorial - Scotch Tape
(© PCArt)Paint Shop Pro


File New .50 inch x 3 inch (or larger if you wish)
300 pixels per inch
Raster background
Selections Select all
Selections Modify Contract x 20
flood fill selection with white
Lower Layer opacity to 53
SAVE

Keep Selected
Add a New Layer
Foreground White / Background Black
Gradient Foreground-Background
Style Linear Angle 180 Repeats 7
Fill Selection with Gradient
Lower layer opacity to 36
SAVE

If White Layer is not on top move to top now
Adjust Add noise Uniform 28% Monochrom
Merge Visible

Choose selection tool Rectangle
Select a tiny part of the tape at the top and slightly higher

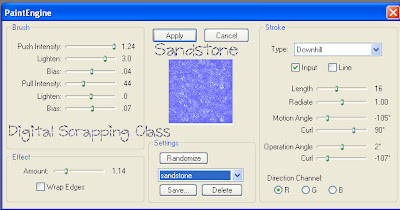
Apply Filter Fantasic Machine Paint Engine Sandpaper downhill

and then Apply effects Blur Gaussian Blur 1 to this selection

SAVE

Repeat this step again at the bottom of the tape

Selections Select all Float defloat
Image Crop to selection

SAVE as .png

Tuesday

Papers


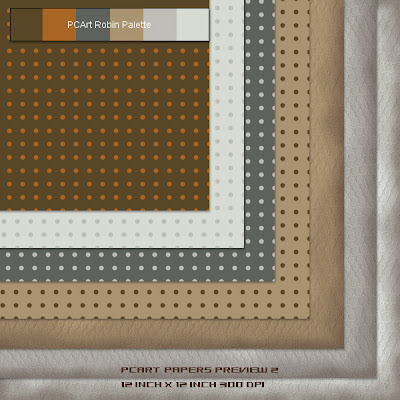
I just thought I had better say, when we create scraps we need a theme. We need to decide what our "kit" is going to look like, what it is about, or for. What Colours, what elements, frames, or such things to we want to incorporate into the whole. That is why I had you practice making a Colour Palette.

If you have created your colour palette for this first kit and you are happy with your colour choice then remember to refer back to it whenever you are making your elements or papers to keep within your theme.

If you are not happy with it - why not try again and when you are happy - you will feel more confident to continue with the rest of your "kit"

Talking about Papers!!! That is what I want you to play with this time - Paper is very important - it forms the background to your layout. You don't want it too busy that it takes over.

If you have never made papers for scrapping before then, Practicing on a 12 inch by 12 inch 300 dpi image in Paint Shop Pro can be very tiring and frustrating if it is going slow you might want to just quit! Don't! - Rather practice on a smaller image say - 600 pixels by 600 pixels so you can get the feel of how your paper might look - try a few practices of patterns colour fills and textures and also play with your effects - get to know what can be done and then as you build your confidence you can make proper papers.

Practice Making Papers


My Method for the Tea Stained Edges Paper

New Raster Layer one - flood fill with my lightest colour from my Robin Palette

New Raster Layer two - Selection/Freehand Selection/Replace/Feather 71/AntiAlias Unchecked -draw selection quite wide in all around the edge - Selections/Invert - Flood Fill with #442f24 Tolerance 20 / Normal / Opacity 16 - Selections/Select None

New Raster Layer three - Selection/Freehand Selection/Replace/Feather 71/AntiAlias Unchecked -draw selection about half the last width all around the edge - Selections/Invert - Flood Fill with #442f24 Tolerance 20 / Normal / Opacity 20 - Selections/Select None

New Raster Layer four - Selection/Freehand Selection/Replace/Feather 71/AntiAlias Unchecked -draw selection close to the edge all around - Selections/Invert - Flood Fill with #442f24 Tolerance 20 / Normal / Opacity 30 - Selections/Select None - Change Layer Opacity to Darken

Then Close Bottom Colour Layer

Merge Visible Edge layers 2,3,and 4 / Adjust / Add Noise /Gaussian /Monachrome /50%

Open Bottom Colour Layer Colour and Apply Effects / Texture if you wish.

I applied a snakeskin texture at size 150

SAVE AS yournamepaper.jpg

You can change your background Colour apply texture and again SAVE AS anothernamepaper.jpg

I also saved my merged stained edge layer on its own as a .png to use as an overlay too.

Why not just dive right in and try using different fill patterns or make your own patterns.


Buttons

Tutorial - Buttons - From this video tutorial


Your first digital scrap layout


Tutorial - Creating Your First Computer Layout
(Paul Mutton 2001-2006)

Note

If you want to print your layout, then you will want to try and achieve at least 300dpi (dots per inch).

This means your layout will have be at least 3600 x 3600 pixels in size to print out a 12 inch square layout. You may need a lot of memory for images of this size, so be warned!


Saturday

South African Blinkies


I made a few Blinkies for my South African visitors! Julle is baie welkom!

Click on images to see the real preview and to save to your computer. Enjoy!