Showing posts with label Ribbons and Bows. Show all posts

Friday

Ribbons and Bows

Ribbons and Bows


Try Shawna's Suede Ribbon too

Now you have had fun making ribbons flat and curled - how about trying your hand at making bows?
Look at bows see how they are constructed then make a copy of your ribbon and cut and paste your pieces into position.

Use the warp tool and or warp brush to bend and push the ribbons into shape
Use your curls for the ribbons hanging down.

Remember to practice and experiment cut them, paste them, twist them, warp them, and colourize them!!


Use the warp tool to bend the ribbons hanging down. Remember practice makes for improvement.

Wednesday

Curled Ribbons with Visros (if you have it)

Curled Ribbons with Visros

based on settings by Laura White  Tutorial link no longer available. See notes below and have fun experimenting!


Open a new image 600 x 600 pixels at 300 pixels per inch.
Draw out a rectangle using preset shapes
Convert to raster layer
Fill with pattern or colour of choice
Keep selected
Apply chosen texture

Go to your plug-in menu, choose Visros, then Twist.
Use the settings below.

Position - Top left
Selection - Input
Parameters
direction - 30
location - 100
radius - 30
Page properties
Keep going back to Page Properties
and go to each of the property options and choose

Fore Page - image (the rectangle you drew) - opaque
Back Page - solid custom color - opaque -
(on the patterned ribbon I used - image - master image - opaque)
(on the plain ribbon I used - solid - customer colour and chose a darker shade)
(on the pale pink ribbon I used - solid - front colour - opaque)

Ground Page - solid - transparent - make sure the slider is fully to transparent
Unselected page - solid - transparent

As always, Experiment,
Try changing the direction / location / radius / settings
and using Adjust / Hue and Saturation / Hue/Saturation/Lightness - try colourizing your finished ribbons

Maybe try adding Greg's Pool Shadow to your straight ribbons - use intensity at about 52


Rick Rack or Ric Rac

Rick Rack

Tutorial - Rick Rack from (Pracken's Paint Scrapbook Series)

I absolutely love the variety of tutorials and skill from this talented lady!


Creating Rick Rack or Ric Rac (I wonder what the correct spelling is here?) was easier than I thought it would be so I enjoyed this valuable lesson.


Tutorial Note from Pat

Click image for larger preview.
I drew mine on 17 inch x 1 inch canvas at 300 pixels per inch with a line width of 150 (to be able to use it corner to corner if need be on a 12 inch page)
I used a pale blue gradient to draw the line - Angle 0 / Style Linear / Repeats 7
At this size I made my Effects / Distortion / Wave settings
Horizontal - Amplitude 0 Wave Length 1
Vertical - Amplitude 6 Wave Length 3
SAVE AS .png

Experiment

Copy your rick rack and paste as a new layer
Try adjusting colours, using
Adjust / Hue and Saturation / Hue/Saturation/Lightness
Experiment with textures and other material fills, blinds effects etc.,

Thursday

Easy Grosgrain Ribbon

Tutorial - Easy Grosgrain Ribbon
(by PCArt)

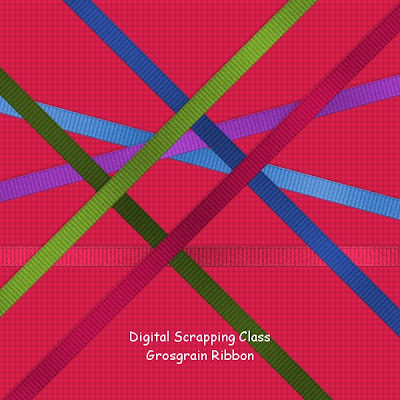
Preview Shown at approximately 20% - Click on image to see larger preview.

You may need to adjust the various settings depending on the size of your ribbon - please note tutorials are merely a guide for you to work with - ultimately the end result reflects your own creativity and individuality and style. Try different noise and blinds settings. Also when creating for a scrap page that you intend printing and creating at the large sizes stipulated, Try viewing at approximately 17% to 20 % to see what the printed image size will be like.

1 - Open a new canvas 17 inches x .50 inches (or however wide or long you want your ribbon to be)
17 inches is so that the ribbon can be used corner to corner at 45 degrees across a 12 inch x 12 inch page.
2 - flood fill your canvas with your colour
3 - selections /select all /modify /contract x 12 pixels / invert selection
4 - add a new layer and flood fill selection with a darker shade of your colour
5 - effects / texture effects / blinds / width 30 opacity 50 colour #202020 / horizontal and light Unchecked
6 - effects / 3d effects / inner bevel / default round - change depth and width to 2
7 - adjust / add remove noise / add noise gaussian monochrome 10 - 15
8 - lower opacity of this edge layer to 50 percent
9 - apply the same blinds and noise effects to the bottom ribbon layer
10 - merge visible
11 - effects / Greg's pool shadow / intensity 52 and lightness 190
12 - use your selection tool to select the end parts of the ribbon "frame" and delete so that your ribbon has raw ends.
13 - selections / select all / float / defloat / crop to selection

File / save as / image name .PNG
Greg's Pool Shadow Zip