Friday

Ribbons and Bows

Ribbons and Bows


Try Shawna's Suede Ribbon too

Now you have had fun making ribbons flat and curled - how about trying your hand at making bows?
Look at bows see how they are constructed then make a copy of your ribbon and cut and paste your pieces into position.

Use the warp tool and or warp brush to bend and push the ribbons into shape
Use your curls for the ribbons hanging down.

Remember to practice and experiment cut them, paste them, twist them, warp them, and colourize them!!


Use the warp tool to bend the ribbons hanging down. Remember practice makes for improvement.

Thursday

DLL files needed

DLL Files Needed

Sometimes we add plugins or filters to our graphics program and they just don't seem to be there.

There are 5 different DLL files needed to run most filter/plugins/add ons with your Paintshop Pro graphics program that are NOT always installed or are not located in the proper folder for your operating system.

I am uploading them to our files section so you can get the ones you do not have.
I have scanned them with AVG and they are clean but always scan things yourself for peace of mind!

MSVCRT10.DLL
msvcrt20.dll
Msvcrt40.dll
msvcrt.dll
plugin.dll

If after installing a plugin/filter AND once you have restarted your graphics program you get a message saying your program is unable to load it, place the above listed DLL's from the zip file as follows:

Windows98: All DLL's go in C:\Windows\System

WindowsME: Plugin.dll goes in your C:\Windows folder AND into your graphics program plugins folder. Msvcrt10.dll goes in your C:\Windows\System folder.

Windows2000: All DLL's go in C:\WINNT\System32

WindowsXP: All DLL's go in C:\Windows\System32

Vista - All DLL's go in C:\Windows\System32

They apparently cannot do any damage - if you put them in the wrong place they will not work.
If they are in the right place they work immediately.

Wednesday

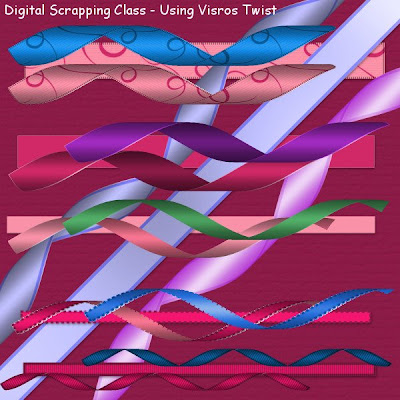
Curled Ribbons with Visros (if you have it)

Curled Ribbons with Visros

based on settings by Laura White  Tutorial link no longer available. See notes below and have fun experimenting!


Open a new image 600 x 600 pixels at 300 pixels per inch.
Draw out a rectangle using preset shapes
Convert to raster layer
Fill with pattern or colour of choice
Keep selected
Apply chosen texture

Go to your plug-in menu, choose Visros, then Twist.
Use the settings below.

Position - Top left
Selection - Input
Parameters
direction - 30
location - 100
radius - 30
Page properties
Keep going back to Page Properties
and go to each of the property options and choose

Fore Page - image (the rectangle you drew) - opaque
Back Page - solid custom color - opaque -
(on the patterned ribbon I used - image - master image - opaque)
(on the plain ribbon I used - solid - customer colour and chose a darker shade)
(on the pale pink ribbon I used - solid - front colour - opaque)

Ground Page - solid - transparent - make sure the slider is fully to transparent
Unselected page - solid - transparent

As always, Experiment,
Try changing the direction / location / radius / settings
and using Adjust / Hue and Saturation / Hue/Saturation/Lightness - try colourizing your finished ribbons

Maybe try adding Greg's Pool Shadow to your straight ribbons - use intensity at about 52


Rick Rack or Ric Rac

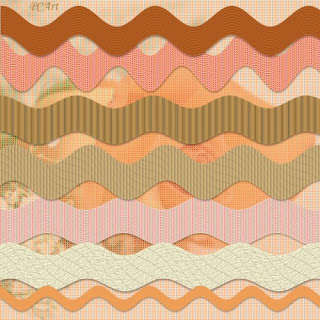
Rick Rack

Tutorial - Rick Rack from (Pracken's Paint Scrapbook Series)

I absolutely love the variety of tutorials and skill from this talented lady!


Creating Rick Rack or Ric Rac (I wonder what the correct spelling is here?) was easier than I thought it would be so I enjoyed this valuable lesson.


Tutorial Note from Pat

Click image for larger preview.
I drew mine on 17 inch x 1 inch canvas at 300 pixels per inch with a line width of 150 (to be able to use it corner to corner if need be on a 12 inch page)
I used a pale blue gradient to draw the line - Angle 0 / Style Linear / Repeats 7
At this size I made my Effects / Distortion / Wave settings
Horizontal - Amplitude 0 Wave Length 1
Vertical - Amplitude 6 Wave Length 3
SAVE AS .png

Experiment

Copy your rick rack and paste as a new layer
Try adjusting colours, using
Adjust / Hue and Saturation / Hue/Saturation/Lightness
Experiment with textures and other material fills, blinds effects etc.,

Tuesday

Size Guide

Element and Paper Sizes

Digital Scrapping Size Guide for Elements and Papers
by PCArt


This is a quick visual size guide for Digital Scrapping, these are basically the sizes I work with and I hope these guides will be helpful to you.


Note:- Images have been re sized for Preview from 12 inch x 12 inch 300 pixels per inch to 78 pixels per inch and 600 pixels x 600 pixels / Smart Size / All Layers.

Converting Scraps Printing sizes
to TAG for web sizes

(by PCArt)

A question comes up quite often when creating Scraps for printing - about them being so big, and how people who do NOT want to print but only want to create for making TAGS for the web and for e-mail, don't know how to adjust thier sizes.

When you look at tags sometimes large elements like paper clips and buttons are used "almost as big".

It really is a question of personal taste.

Can you believe converting your size while creating from a tutorial is this easy?
Simply follow the Scrapping tutorial with the dimensions given, But change from 300 pixels per inch to 72 pixels per inch :)


Please note that creating on a smaller image also means down sizing the textures etc., given in the tutorials, so you will need to experiment with effects and filters to suit yourself.

Also a 12 inch x 12 inch paper will still be too big for a tag even at 72 pixels per inch so if you plan on creating a "paper" for your tags make it about 600 x 600 pixels at 72 pixels per inch.

EXAMPLES
POST CARD Print Size 6 inches x 4 inches at 300 pixels per inch as per Scrapping Tutorial/size guide.
*Converted to TAG size - same dimensions 6 inches x 4 inches at 72 pixels per inch
Postage Stamp for print size 1 inch x 1,5 inches 300 pixels per inch as per Scrapping Tutorial/size guide.
*Converted to TAG size - same dimensions 1 inch x 1,5 inches at 72 pixels per inch

Monday

Make Stickers

Making Stickers

Make sticker like images by using preset shapes and then adding a white flat edge to your images.

Use the magic wand to select areas of the image and while selected, apply a soft bevel to those areas to make them appear raised or cushioned above the white edges.


Try applying a texture to your areas of colour and a soft bevel too.

Make your own Brads

Make Your Own Brads

Using the skills you have already acquired, open a new image and then using shapes - circle, select and while selected fill with patterns and use image effects kaleidoscope to create amazing patterns. Apply a slight bevel to the edge and there you have a lovely brad!  Save as a .png image to place on your scrapping pages.


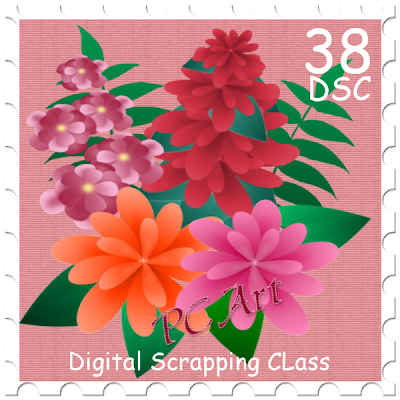
Postage Stamp


Tutorial - Creating a Postage Stamp  * 2017 tutorial link is no longer available - see notes below.
(By Zee Helmick)


Click on Image to see Preview shown at 600 pixels x 600 pixels at 78 pixels per inch

Tutorial Note from Pat

I worked on a 3 inch x 3 inch canvas at 300 pixels per inch
Flood fill with a colour to work over.
Add new Raster Layer / Selections select all contract x 41 flood with white
To cut the edges
View / Grids to see them / View / Change grids to 45 vertical and 45 horizontal
Eraser - Size 45 / erase dot on every other grid crossing around the white edge
Text - I used Comic Sans MS - sized at 30 points, 15 points and 12 points
Decorate with image of your choice.
I applied an Inner bevel to my stamp and a drop shadow, and saved as .png


Saturday

Patchwork Flower Layout

Tutorial - Patchwork Flower Layout - * 2017 link no longer available
(by Zee Helmick)

Sorry the link is not available but use the image below as inspiration to create a similar layout.
Please share your results in our Facebook group -  Art & Digital Art Friends and use this patchwork flower template if you wish.


Ballet Image from Public Domain


Friday

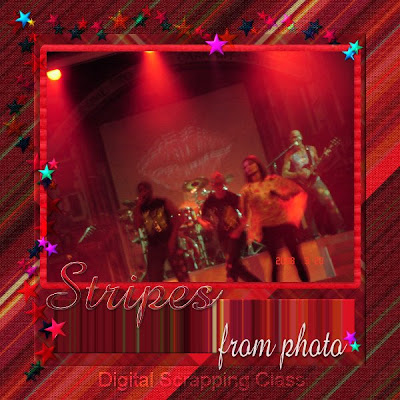
Stripes from a Photo

Tutorial - Stripes from Photo no longer available (by Lori J Davis)

Here is another tutorial using Photoshop - but it will work in Paintshop Pro with a few little tweeks.

This tutorial can be used to create stripes for a paper or to create a different colour pallete if you are having difficulty choosing colours to work with for a certain image.

It can be used as a pattern fill - Experimenting with your program and colours, effects and settings is the key to creating something you did not at first expect.

A lot of my things are made "by accident" simply because of experimenting.

Just one thing - if you get something you really like - save it! (or write it down in a note book so you can remember how you did it, or so that you can tell us how you did it!)