 The History of the Pink Ribbon

Journaling Graphics, Inspirational Graphics, Digital Scrapping, Lessons, Tutorials, Templates, Digital Scrapbooking, PaintShop Pro, Canva,
Friday
Pink is for October
 Artist exploration, watercolour, creativity, inspirational, digital graphics, Journal Art, Scrapbooking, design, patterns, seasonal art, fun art,
Halloween Witch
Halloween Witch Drawn freehand in PaintShopPro and Wacom tablet.
Drawn freehand in PaintShopPro and Wacom tablet. Clothing shaded using Mura Meister's Clouds.
Use the warp brush to make the curves at the bottom of the cape.
Artist exploration, watercolour, creativity, inspirational, digital graphics, Journal Art, Scrapbooking, design, patterns, seasonal art, fun art,
Sunday
All about the heart font

All about the Heart Font
Create a Valentine Tag or Card with Word Art
Use KR All about the heart https://www.1001fonts.com/kr-all-about-the-heart-font.html - Free for Personal for your chosen heart design.
Share your results at Digital Friends on Facebook
Artist exploration, watercolour, creativity, inspirational, digital graphics, Journal Art, Scrapbooking, design, patterns, seasonal art, fun art,
Scraplifting

SCRAPLIFT
Copy the layout above to create a Scraplift Layout of your choice, using your own elements and images or if you use items from someone else - please credit them as I have done below.
Pressed flowers from Dozibaer - Her link is on the side bar
I "trace-painted" the centre picture of Violets using ART RAGE.
As always if you need help let me know by email.
The rest of the scrapping elements etc, were created in Paintshop Pro.
What is Scraplifting?
Scraplifting: Copying one or more design elements (title, page layout, etc.) from someone's layout and using it for your own scrapbook pages. Fairly common among scrappers, especially when suffering from Scrapper's Block. As the saying goes... "Imitation is the most sincere form of flattery."
Scraplifting Etiquette:
Personally I would not CASE a layout "Copy and Steal Everything"
Better to use a layout as an inspiration and then use your own ideas and scraps to make it your own.
Artist exploration, watercolour, creativity, inspirational, digital graphics, Journal Art, Scrapbooking, design, patterns, seasonal art, fun art,
Layouts using Overlays
Layouts Using Blending Overlays in PSP

I strayed away from the tutorial slightly but had fun just the same
The photo was taken by one of my nephews.
TUTORIAL LINK
I strayed away from the tutorial slightly but had fun just the same
The photo was taken by one of my nephews.
TUTORIAL LINK
Artist exploration, watercolour, creativity, inspirational, digital graphics, Journal Art, Scrapbooking, design, patterns, seasonal art, fun art,
Knitted Hedgehog
Knitted Hedgehog

The hedgehog was created from a tutorial which appears to no longer be available.
The hedgehog was created from a tutorial which appears to no longer be available.
Use the knit stitch fill pattern to fill the shape of the hedgehog, then colourise.
Use the WARP tool to expand on the tummy and face and animal fur generator brush for the fur

 Artist exploration, watercolour, creativity, inspirational, digital graphics, Journal Art, Scrapbooking, design, patterns, seasonal art, fun art,
Draw a Pencil Paintshop Pro Tutorial
Pencil
by PCArt 01 March 2009
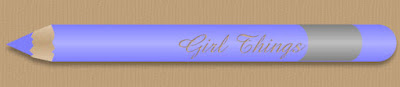
Open New Image
4 inches x 1 inch at 300 pixels per inch
Foreground #afb0ff and Fill #8080ff
Click on fill colour and choose gradient foreground background
Repeat 1 Linear invert Angle 0
the darker shade should be outside and lighter shade inside
Preset Shapes Rectangle
Draw out an oblong shape to represent your pencil shaft
New Layer
Preset shapes Elipse - draw out an elipse to fit the end of your pencil
New Layer - Pencil Point
Preset Shape Triangle draw out a small triangle with your fill colour
Rotate 90 degrees left all layers un checked.
Place in position at the point of your pencil leave a little space for the wood
New Layer - Pencil Wood
Selections Freehand Point to point
draw in your wood and fill with a wood colour and add noise if you wish
Merge Visible
Decorate as you please
Made in Paint Shop Pro XI
by PCArt 01 March 2009
Open New Image
4 inches x 1 inch at 300 pixels per inch
Foreground #afb0ff and Fill #8080ff
Click on fill colour and choose gradient foreground background
Repeat 1 Linear invert Angle 0
the darker shade should be outside and lighter shade inside
Preset Shapes Rectangle
Draw out an oblong shape to represent your pencil shaft
New Layer
Preset shapes Elipse - draw out an elipse to fit the end of your pencil
New Layer - Pencil Point
Preset Shape Triangle draw out a small triangle with your fill colour
Rotate 90 degrees left all layers un checked.
Place in position at the point of your pencil leave a little space for the wood
New Layer - Pencil Wood
Selections Freehand Point to point
draw in your wood and fill with a wood colour and add noise if you wish
Merge Visible
Decorate as you please
Made in Paint Shop Pro XI
Artist exploration, watercolour, creativity, inspirational, digital graphics, Journal Art, Scrapbooking, design, patterns, seasonal art, fun art,
Roses
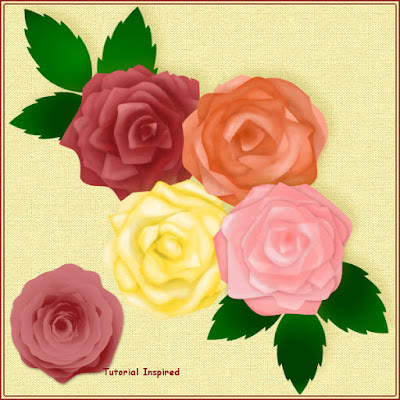
Drawing a gradient Rose in Paint Shop Pro XI
by PCArt 04 June 2009
Open a New Image 600 pixels x 600 pixels at 300 pixels per inch
To start off..........
Set your foreground colour to #fdb9bb
Set your background to #8a191b
Set your Gradient to Sunburst
Center point Horizontal 78
Center Point Vertical 41
Focal Point Horizontal 27
Focal Point Vertical 76
Using your pen tool Freehand
Tracking 82
Anti Alias checked
Line Width 0
Connect segments checked
Create on Vector checked
Draw irregular shaped (circles?)
decreasing in size each on a new layer
and going to your gradient and inverting
and un inverting on each alternate layer
Then add a shadow beneath each "petal" layer
Expirement with other colours and gradient positions - and see what you can create.
Try adjusting the brightness and contrast on a few layers too.
Add more definition and depth by using your lighten/darken tool on the petals.
You have a Rose!
Artist exploration, watercolour, creativity, inspirational, digital graphics, Journal Art, Scrapbooking, design, patterns, seasonal art, fun art,
Lady Bugs Tutorial Paintshop Pro
LADYBUG
This ladybug was created Using Paint Shop Pro XI
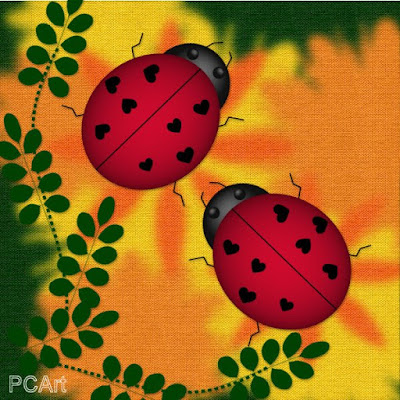
This is only a guide to help you make your own
Effects / Artistic Effects / Balls and Bubbles
I have added my settings to Digital Scrapping Class Folders,
which if you choose to use them need to go in your PRESETS folder.
Head and Eyes - Balls and Bubbles - Preset AND Body - Balls and Bubbles - Preset
send me an email and I will send you the presets.
Use the deformation tool or Pick tool to make the red ball oval.
Place the black ball below the red one and reduce in size.
duplicate and reduce a lot more for the eyes.
Draw the legs, antennae and dividing line for wings with your pen tool.
Decorate with Hearts with preset shapes.
MANUAL BALLS AND BUBBLES SETTING
SHAPE - Single Ball or Bubble - Maximum size
SURFACE - Black - Opacity 100 - Shininess 75 - Gloss 61
MAPS - nothing selected
ILLUMINATION - Ambience maximum 100 and minimum 22
colour #404040 - Highlight size 59 - back light not checked
The red setting is the same as the black one
the only difference is the Surface colour is red.
This ladybug was created Using Paint Shop Pro XI
This is only a guide to help you make your own
Effects / Artistic Effects / Balls and Bubbles
I have added my settings to Digital Scrapping Class Folders,
which if you choose to use them need to go in your PRESETS folder.
Head and Eyes - Balls and Bubbles - Preset AND Body - Balls and Bubbles - Preset
send me an email and I will send you the presets.
Use the deformation tool or Pick tool to make the red ball oval.
Place the black ball below the red one and reduce in size.
duplicate and reduce a lot more for the eyes.
Draw the legs, antennae and dividing line for wings with your pen tool.
Decorate with Hearts with preset shapes.
MANUAL BALLS AND BUBBLES SETTING
SHAPE - Single Ball or Bubble - Maximum size
SURFACE - Black - Opacity 100 - Shininess 75 - Gloss 61
MAPS - nothing selected
ILLUMINATION - Ambience maximum 100 and minimum 22
colour #404040 - Highlight size 59 - back light not checked
The red setting is the same as the black one
the only difference is the Surface colour is red.
Artist exploration, watercolour, creativity, inspirational, digital graphics, Journal Art, Scrapbooking, design, patterns, seasonal art, fun art,
Font fun
Using the Font Aierbazzi
by Roberto Cecchi

Find Aierbazzi.ttf at this link
https://www.dafont.com/aierbazzi.font
Create your own masterpiece, it can be a tag, or paper, or "painting", a tree, bouquet, accent, underwater scene, jungle scene, fantasy, grunge, overlay, picture frame or anything you want. There is a different image for each letter of the alphabet, you will need to increase your font size to at least 200 points or 800 pixels to get the sizes above. The owl is from AEZ Owls for Traci also available at dafont.com.
Please feel free to show off your results at Art & Digital Art Friends on Facebook 😁😁😁
Enjoy!
xoxoxo pat/PCArt
by Roberto Cecchi
Find Aierbazzi.ttf at this link
https://www.dafont.com/aierbazzi.font
Create your own masterpiece, it can be a tag, or paper, or "painting", a tree, bouquet, accent, underwater scene, jungle scene, fantasy, grunge, overlay, picture frame or anything you want. There is a different image for each letter of the alphabet, you will need to increase your font size to at least 200 points or 800 pixels to get the sizes above. The owl is from AEZ Owls for Traci also available at dafont.com.
Please feel free to show off your results at Art & Digital Art Friends on Facebook 😁😁😁
Enjoy!
xoxoxo pat/PCArt
Artist exploration, watercolour, creativity, inspirational, digital graphics, Journal Art, Scrapbooking, design, patterns, seasonal art, fun art,
Subscribe to:
Posts (Atom)