by PCArt

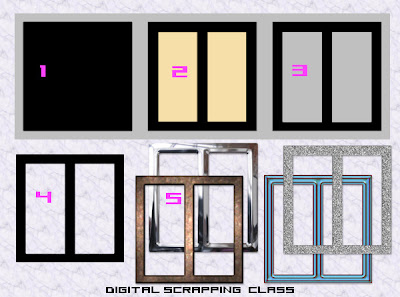
I know I had some problems making the buckle and I also know I'm not the only one who had difficulty following the tutorial we have. So here is my quick 'n easy solution!
(My buckle was drawn out on a 300 x 300 pixel canvas at 300 pixels per inch.)
Fill your canvas with a light grey.
1) Using your square preset shape - vector and antialias checked - background fill colour black - draw out a square for your buckle as large as you want it to be. Object / align / centre in canvas. Convert to raster.
2) On a new layer using your rectangle preset shape - vector and antialias checked - background fill any other colour - draw out a rectangle where you want the left hand opening of the buckle to be. Position it exactly as you want it to be. Duplicate this layer and go to image mirror. Close your bottom layers. Keep only the twin rectangles visible. Merge visible.
3) View all layers again. On the twin rectangle layer - selections / select all / selections / float / selections defloat. Selections / Modify expand x 1 pixel - go to your black layer and press delete. Selections None.
Go back to your twin rectangle layer and delete it. Go to your grey layer and delete it.
4) You now have a Template for your buckles. SAVE AS BUCKLE TEMPLATE.psp image
5) Use your template "selected and expanded x 1 pixel / antialias checked "
- then on a new layer - fill with colours, patterns, apply bevels, sculptures, etc.
Cut your finished buckles and paste each as a new image and Save As .png


No comments:
Post a Comment