Magickal Mask - © PCArt
12 August 2004
This Tutorial is my own creation. Please do
not copy it or claim it as your own. I hope you enjoy doing the tutorial, your
creation is yours to do with as you please. If you would like to share this
tutorial through a group or to a friend Please supply only a text link to
it.
What you will need
Paintshop Pro (This was done with Paintshop Pro 9
Trial version)
(it can probably be done with ease using other versions
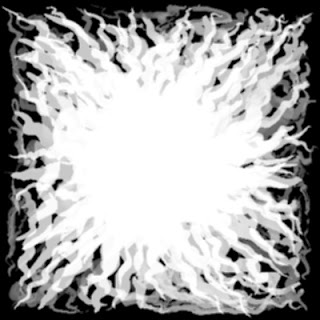
of Paintshop Pro)Mask 068
Right click image to open the mask in a new window and then save to your PC as Mask068.jpg
Font of your choice
Tube of your choice a large tube will work well.
This tutorial was very easy to do and I love the result,
~~~~~~~~~~~~~~~~~
Open New Image 500 x 300 pixels
Flood fill with blackOpen the pictureTube you wish to use
Making the mosaic background
Copy and paste as a new layer and minimize original tube
Even if the tube is miles too big for the layer just leave it as it is don't resize it.
Effects / Texture Effects / Mosaic Glass / (Crazy) Grid Columns 25 and Rows 25 Symmetric, Tile diffusion 39, Grout width 2, Grout diffusion 100
Add a new layer and flood fill with any colour from
your tube, but not black, I used #a18f6e
Apply Mask 068Source Luminance checked, Invert Transparency Checked,
Fit to canvas checked, hide all mask checked.
In your layer palette Delete mask layer, Click Yes to info box
Duplicate the Mask Layer
**Change opacity in the layer palette on this top mask layer to Difference**.
Go back to your Top layer.
Go to the tube you minimized at the beginning and Copy and paste as a new layer.
Resize this new tube layer to 50%, All layers Unchecked
Add a new Layer to Add your Text
Add your watermark and embellishments or frame and you are done.
I hope that you enjoyed doing it as much as I enjoyed creating it.
I would really appreciate your feedback and seeing your finished result.


No comments:
Post a Comment