Tuesday

Papers


I just thought I had better say, when we create scraps we need a theme. We need to decide what our "kit" is going to look like, what it is about, or for. What Colours, what elements, frames, or such things to we want to incorporate into the whole. That is why I had you practice making a Colour Palette.

If you have created your colour palette for this first kit and you are happy with your colour choice then remember to refer back to it whenever you are making your elements or papers to keep within your theme.

If you are not happy with it - why not try again and when you are happy - you will feel more confident to continue with the rest of your "kit"

Talking about Papers!!! That is what I want you to play with this time - Paper is very important - it forms the background to your layout. You don't want it too busy that it takes over.

If you have never made papers for scrapping before then, Practicing on a 12 inch by 12 inch 300 dpi image in Paint Shop Pro can be very tiring and frustrating if it is going slow you might want to just quit! Don't! - Rather practice on a smaller image say - 600 pixels by 600 pixels so you can get the feel of how your paper might look - try a few practices of patterns colour fills and textures and also play with your effects - get to know what can be done and then as you build your confidence you can make proper papers.

Practice Making Papers
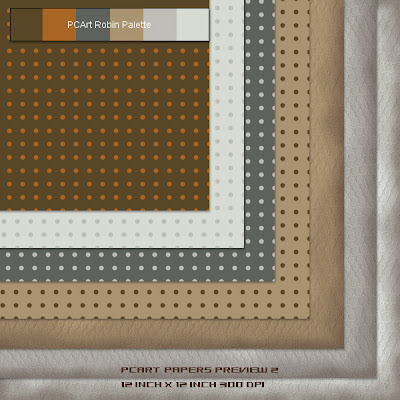


My Method for the Tea Stained Edges Paper

New Raster Layer one - flood fill with my lightest colour from my Robin Palette

New Raster Layer two - Selection/Freehand Selection/Replace/Feather 71/AntiAlias Unchecked -draw selection quite wide in all around the edge - Selections/Invert - Flood Fill with #442f24 Tolerance 20 / Normal / Opacity 16 - Selections/Select None

New Raster Layer three - Selection/Freehand Selection/Replace/Feather 71/AntiAlias Unchecked -draw selection about half the last width all around the edge - Selections/Invert - Flood Fill with #442f24 Tolerance 20 / Normal / Opacity 20 - Selections/Select None

New Raster Layer four - Selection/Freehand Selection/Replace/Feather 71/AntiAlias Unchecked -draw selection close to the edge all around - Selections/Invert - Flood Fill with #442f24 Tolerance 20 / Normal / Opacity 30 - Selections/Select None - Change Layer Opacity to Darken

Then Close Bottom Colour Layer

Merge Visible Edge layers 2,3,and 4 / Adjust / Add Noise /Gaussian /Monachrome /50%

Open Bottom Colour Layer Colour and Apply Effects / Texture if you wish.

I applied a snakeskin texture at size 150

SAVE AS yournamepaper.jpg

You can change your background Colour apply texture and again SAVE AS anothernamepaper.jpg

I also saved my merged stained edge layer on its own as a .png to use as an overlay too.

Why not just dive right in and try using different fill patterns or make your own patterns.



Buttons

Tutorial - Buttons - From this video tutorial


Your first digital scrap layout


Tutorial - Creating Your First Computer Layout
(Paul Mutton 2001-2006)

Note

If you want to print your layout, then you will want to try and achieve at least 300dpi (dots per inch).

This means your layout will have be at least 3600 x 3600 pixels in size to print out a 12 inch square layout. You may need a lot of memory for images of this size, so be warned!


Saturday

South African Blinkies


I made a few Blinkies for my South African visitors! Julle is baie welkom!

Click on images to see the real preview and to save to your computer. Enjoy!

Wednesday

Vinyl LP FREE Vinyl Record PNG


I created this layout using a Vinyl LP which I created in Paint Shop Pro - I used used reflection effects/feedback and then layer blends and Greg's pool shadow - it finally worked for me.

If you would like the FREE  PNG of the Vinyl Record, 
Please email me to request it. 

You may use the Image of the record however you please in your designs. 


Saturday

Create a Vase in Paintshop Pro


Create a Vase - © PCArt 11 September 2004

This Tutorial is my own creation.   Please do not copy it or claim it as your own. I hope you enjoy doing the tutorial, your creation is yours to do with as you please. If you would like to share this tutorial through a group or to a friend Please supply only a text link to it. 

What you will need 
Paintshop Pro (this was done with 9 Trial version)
(it can probably be done with ease using other versions of Paintshop Pro)
Flower tubes of your choice
~~~~~~~~~~~~~~~~~

1) Open New Image 400 x 600 pixels Transparent background
Remember to Save Often

2) Make Foreground white and background Null in colour palette

3) Go to Preset shapes select ellipse / mode circle / create on vector / line width 1 / Anti-alias
Draw a circle about one third of the size of your canvas, use your mover tool to move the circle down towards the bottom of your canvas, go to Objects / Align / Horizontal in canvas
Right Click on your vector layer in your layer palette and convert to Raster layer

4) Use the Magic Wand to click in the middle of the circle and now you have marching ants where your line is - Keep Selected and Add a New Raster Layer
Effects / 3D Effects / Cut-out / with these settings
Vertical 8 Horizontal -6 Opacity 48 Blur 20 Fill interior with colour unchecked

5)Keep Selected and Add a New Raster Layer
Effects / 3D Effects / Cut-out / with these settings
Vertical -13 Horizontal 11 Opacity 40 Blur 30 Fill interior with colour unchecked

You now have four layers
your base layer with nothing on it
your second layer with the white circle edge
your third and fourth layers with the individual cut-outs

6) Click on the eye in layer palette on layer one and two to make them invisible
Right Click on layer three or four and Merge / Merge Visible

7) Click in centre of white circle on layer two with your magic wand
Add a new Raster Layer!
Using your Flood Fill Tool (The bucket)
Flood Fill with Ocean Blues Gradient / Style Linear / Angle 182 / Repeats 0 / Invert Checked
Adjust / Add Noise / Uniform / 15
Selections / Select None
You can lower the opacity on this layer to about 90

8) Use your selection tool / rectangle,  to select a small portion of the top part of your filled circle and delete leaving it with a flat top for the neck of the vase
Keep Selected and repeat delete on the Merged Layer to clean the top part of the cut-out
Add a New Raster layer
Use your selection tool to select a rectangle shape at the top of your image to create a top for your vase
Flood fill with white Keep Selected
Flood fill with Metal Brass Gradient / Linear / Angle 90 / Repeats 0
Selections / Select None

9) **Repeat this task (8) **at the bottom of your circle to form the base
SAVE YOUR WORK
Now you can select flower tubes to place in your vase
Now you can delete the white circle layer you don't need it anymore
Fill your base layer as you wish, mine is flood filled with Black
Add your watermark and embellishments or frame and you are done.

I hope that you enjoyed doing it as much as I enjoyed creating it.

I would really appreciate your feedback and seeing your finished result.

Thursday

Magickal Mask


Magickal Mask - © PCArt 12 August 2004

This Tutorial is my own creation.  Please do not copy it or claim it as your own. I hope you enjoy doing the tutorial, your creation is yours to do with as you please. If you would like to share this tutorial through a group or to a friend Please supply only a text link to it. 

What you will need

Paintshop Pro (This was done with Paintshop Pro 9 Trial version)
(it can probably be done with ease using other versions of Paintshop Pro)

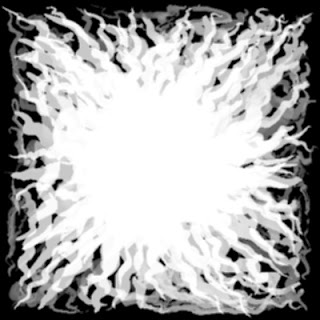
Mask 068
Right click image to open the mask in a new window and then save to your PC as Mask068.jpg
Font of your choice
Tube of your choice a large tube will work well.
This tutorial was very easy to do and I love the result,

~~~~~~~~~~~~~~~~~

Open New Image 500 x 300 pixels
Flood fill with black
Open the pictureTube you wish to use


Making the mosaic background
Copy and paste as a new layer and minimize original tube
Even if the tube is miles too big for the layer just leave it as it is don't resize it.
Effects / Texture Effects / Mosaic Glass / (Crazy) Grid Columns 25 and Rows 25 Symmetric, Tile diffusion 39, Grout width 2, Grout diffusion 100

Add a new layer and flood fill with any colour from your tube, but not black, I used #a18f6e
Apply Mask 068
Source Luminance checked, Invert Transparency Checked,
Fit to canvas checked, hide all mask checked.
In your layer palette Delete mask layer, Click Yes to info box

Duplicate the Mask Layer
**Change opacity in the layer palette on this top mask layer to Difference**.

Go back to your Top layer.
Go to the tube you minimized at the beginning and Copy and paste as a new layer.
Resize this new tube layer to 50%, All layers Unchecked
Add a new Layer to Add your Text
Add your watermark and embellishments or frame and you are done.

I hope that you enjoyed doing it as much as I enjoyed creating it.
I would really appreciate your feedback and seeing your finished result.