by ©PCArt 26 May 2008
Using Paint Shop Pro
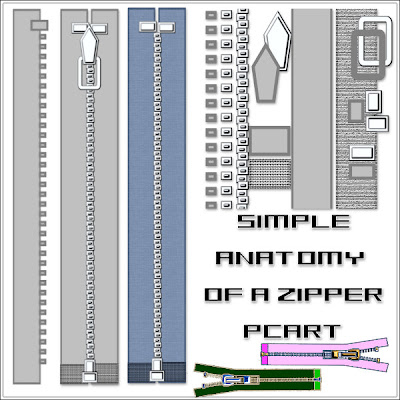
This is a basic tutorial guide to create a zipper in Paint Shop Pro, for your scrapping. It might be rated as an advanced tutorial because, a lot of imagination is required as I want your results to really be your own!
You will need Mura's Meister Copies. If you don't have it, do a Google search and you are sure to find it quite easily.

Tutorial - see the image for guidance
Open a new Image 650 pixels x 1850 pixels at 300 pixels per inch
Transparent Background.
Preset Shape Rectangle Anti-alias and Create as Vector checked
Retain style unchecked
Line style default solid Width 10
Foreground Colour #808080
Background Fill Colour #c0c0c0
1)Draw out a tall narrow rectangle and Convert to Raster layer
2)Draw Small rectangle at top of zipper and Convert to Raster layer
3)Draw out an even smaller rectangle for a zipper tooth - Convert to Raster layer
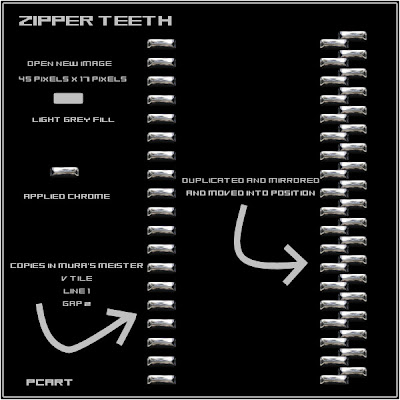
4)Effects Plugins Mura's Meister Copies - Reset and then change Tile Mode to V Tile
and change Number to 1 and Gap to 1 or 2 (depending on the size of the tooth)
See Zipper Teeth Image below if you want to make the teeth first and build your zip around them.
5) Use your selection tool to select and cut away extra teeth at top and bottom.
6) Apply Your Sculpture or bevel to the teeth.
7) Apply your sculpture or bevel to the small rectangle.
6) Apply your texture or colour to your long rectangle.
8) See images to place your zipper parts together.
9) Duplicate and position where necessary.
10)Use your imagination to draw the extra pieces to make your zipper details.
Once you see how easy it can be and you have got the idea of how your zipper is constructed and fits together, you can start experimenting with different shaped teeth and fabrics. Go your own way with your imagination, making your own styles and shapes and improving on details for the shaping, the teeth and zipper pull and fabric etc.,
*Idea* When you have created a set of zipper teeth that you like save as a separate image and add your fabrics to it.

Click on Image above to see a larger Preview

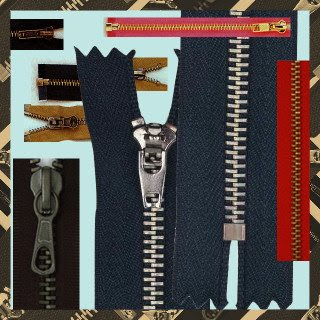
Have a look at different zippers to see how many styles there are.


2 comments:
thank you Pat and will love trying this~love your group :) it's just too fun!
patty
(gulp) going to have a try at this. Thanks Pat
Post a Comment